Tech 4 Frontier Gunfight
March 27, 2011
New, hopefully quick project in the works today. Details and pics to below.
The idea behind the game was that playing Traveller’s Azhanti High Lightning Rules (AHL) as a direct skirmish game would be fun, easy to learn and connect people to the Traveller world at a con.
The concept would be a fast play game playable in under 60 minutes that would allow character and skill based play (Traveller) in a recognizable setting (Wild West) that could be framed in a Traveller milieu (as TL 4) and would be enjoyable as a stand alone or walk up game.
I have a lovely set of 15/18mm Blue Moon Western figs on the painting block and a diminutive set of Peter Pig Western buildings that I picked up on ebay for a song. These will serve as the raw material for the setting.
I’ve been toying with the idea of creating a collection of role play “sets” for Traveller after the model of the movie sets that are often reused and reshot for different cinematic moments. The idea behind this particular set is “dusty frontier spot” which could serve as a backdrop for wild west, mexican adventure (like the pursuit of Pancho villa), the Northwest frontier, or even Mos Eisley from Star Wars. The only difference being the specific uses would be the structures, figures and flora. The thought that some Firefly play might fit that setting didn’t escape me either.
So the observation is that such a game would have to have a small footprint. I’ve played larger con games on a huge 8’x14′ table and they are very difficult to keep running smoothly since inevitably someone is in the middle of careful decision making and intense combat while someone else is just moving up to join the action. A smaller format keeps the setup, game management and play time down to a minimum and focuses on the narrative action. Much better for role play/wargaming too!
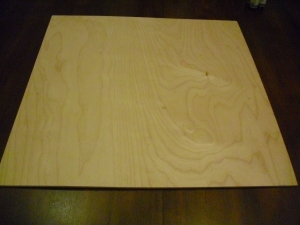
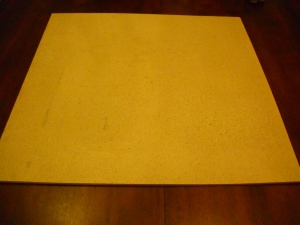
So I bought a 24″ x 24″ board at Home Depot and started off by spraying one face of the board with Krylon Make it Stone! textured paint. I used the Travertine Tan color since it is a dusty tan with flecks of texture and color. The can says that it covers 6 square feet. I was able to get a thick and intentionally uneven coat of my whole board before emptying the can.
Here’s a pic of the board before texturing:
And after the texture paint has been applied:
So now the moment of drama…spraying on the square grid.
I took my handy Litko 1/2″ grid template and set to work. The template itself has a spray area slightly smaller than its full two foot size. After experimenting with fitting it in different configurations, I decided to fix the middle of the template down the middle line of the board. This configuration required me to spray the template three times: once down the middle and once on each side.
The first spray went well. I used Model master Sandgelb as the grid color since it seemed to stand out well enough without contrasting too sharply with the textured paint. Lining up for the second spray was a little fiddly and required a bright light and glasses to get everything set. After pulling of the templates and masks, I was happy to see a nice transition. The set of squares that I used for the template overlap came out distinctly darker which was an imperfection but a tolerable one.
I set out to line up everything on the other side taping down the templates and mask carefully to make sure I had a good alignment.
The Sandgelb paint, which I had not used before, was quite thick in the jar. My normal acrylic airbrushing mix of about 3:1 paint to thinner was not going to work so I went down to a soupier 1:1 consistency. This thinner mix sprayed a nice light tone on the set, but it also ran through the airbrush faster. Right before finishing the bottom corner of the final template spray, I ran out of paint and had to mix a new batch.
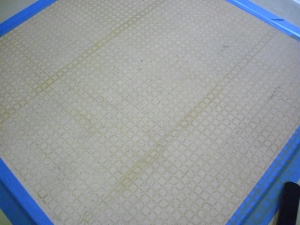
I pulled up the corner of the template to see what if any paint had gotten on the set before the brush ran dry. Definitely another mix was required. Apparently though, when I pulled the corner up, I also pulled the template slightly out of alignment. When I finished the spray and removed the template, I found that the overlap squares had become out of alignment and had a weird double exposure kind of effect. Very disappointing.
Here’s the outcome:
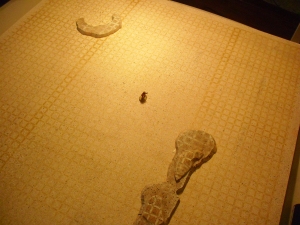
Some quick thinking was required to address the problem. I decided to use some 1/4″ GHQ Terrain maker tiles to shape a rock outcrop to position over the boo-boo.
Here the final result of the set:
Next step: painting the western buildings…
AHL Tunnel System
March 22, 2011
I’ve made some plans to attend TravellerCon 2011 in Lancaster PA (eastern US) this October. Since I was thinking of running some games of Azhanti High Lightning/Striker, I got in touch with the organizers via their Yahoo group.
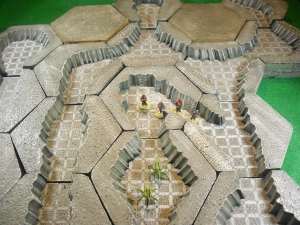
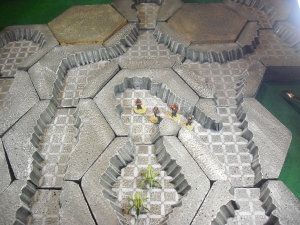
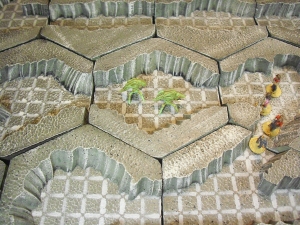
These pics are of the Countess Anar and Dr Maxwell (Citadel Traveller) making their way through underground tunnels chased by some nasty bug things (Khurasan Miniatures). The terrain is the underground tunnel system I described in an earlier post made with Terrain Maker tiles and a custom AHL/Snapshot stencil made for me by Litko.
I am new at photographing miniatures so forgive my newbie mistakes. Feedback on the pics and the terrain are very welcome. Here goes:
The half inch square grid allows AHL play. Figs are on 1/2″ washers, bugs are unbased since they look scarier that way.
Underground Tunnels for Snapshot/Azhanti High Lightning
March 3, 2011
I have enjoyed and still enjoy Snapshot and Azhanti High Lightning (more on that in an upcoming post.) I play with 15mm minis including the old Martian Metals figs that I bought at the Compleat Strategist in Manhattan in the 70s and early 80s. For years I played on my venerable Snapshot deckplans or other paper 2D plans (home made and the wonderfully crappy Judges Guild deck plans which I still have.) While we certainly had some great games — lots in fact — the Flatland effect did not seem to do justice. I wanted something more.
As a regular attendee of Cold Wars, Historicon, and Fall In wargame cons run by the Historical Miniature Game Society (HMGS) of which I am a member, I played a modern zombie game with a great set of unpublished rules by a young lady named Audrey. The game took place in a typical urban downtown area and the whole setup was made with printed paper on foamcore. That might not sound so cool as described but check out her pics here:
Audrey’s Oubliette discussing building 3D structures from foam core and paper
The terrain also had detailed interiors. As a 15mm wargamer, I had become used to resin cast solid buildings. These are often pretty nice on the outside, but lack any interiors at all and so they aren’t so good for skirmish type games. Audrey’s works were an inspiration even if they were made for 28mm figs. I wanted to build a street scene of my own for similar games.
The challenge was that the building interiors — while gorgeous — were a little crowded for stubby, wargamer fingers. (Audrey herself was graceful and thin fingered so they worked perfectly for her.)
I’ve been fiddling with a number of solutions to this problem and I have finally come up with one that I like. By making the walls less then full height, I can have the advantages of a 3D model and still have ample finger room.
My first moderately successful attempt at 3D terrain for Snapshot/AHL is a set of hexagonal interlocking terrain tiles for an underground tunnel system. Here’s a pic
The terrain is my first experiment in this type of modeling. I started with GHQ’s Terrain Maker tiles in 1/2″ thickness. They make several different sizes and sets. I chose 1/2 inch tiles since the height of the tiles (12.5mm) is lower that the height of the figs (15-18mm + 2mm thick washer base) and seems to avoid the fat fingers problem.
I painted half the 48 tiles I had on hand with Ceramcoat’s Hippo Gray. Then I washed these tiles with a black wash and set them off to dry. I dry-brushed them with a light gray (which looks pretty light here.) I also painted 5 of the sides gray and one black as a orientation key.
I set these tiles aside.
I then laid out the remaining tiles and used a highlighter to design the path of tunnels through the hexes. I mixed straights, 60 degree and 120 turns and T’s and Ys with a couple of dead ends. I only had 24 tiles in the first set so I had limited resources to work with.
Then I created a marking jig to create alignment marks on each face before I started cutting the tiles with a wire cutter. The jig was an index card trimmed to match the shape of the hex face with two notches cut into the edge about 1.5 inches apart. I used the jig by laying it on each hex side and making two marks where the final cuts should leave the hex face. This way I had a reasonable certainty that the exiting tunnels would line up with each other when I stuck them together.
The whole design was meant to be interlocking so that I could change the configuration from game to game. The thought also dawned on me that characters travelling in tunnels can only see so far. That meant that I only actually needed a few tiles down at any given time. I could pick up the tiles from places the characters had travelled through but could no longer see. By rotating the playing surface 90 degrees every time I picked up tiles, I could confuse the hell out of a party and turn a simple tunnel system into a real labyrinth. (Link to Evil Genius Laugh soundtrack)
To support the picking up and putting down of tiles and to create more ambience in the adventures, I wanted to have a way to pick up and put down tiles so that the underground cave was exactlly the same. Since the pieces were all custom made and no two would exactly be alike, I planned to number them. To make mapping and alignment easier I planned on one edge being painted black so that I could use that edge to orient the piece on an underground map.
I got out my hot wire cutter and went to work. I cut an irregular edge at a slight outward angle with at least the idea of a water eroded limestone cave.
I then painted all the cut pieces Hippo Gray, black washed and drybrushed them. All the components were done at this point and were ready to be glued together. Before I glued them, I need to spray on the playing grid that turned these tiles into Snapshot/AHL mini-terrain boards.
Previously I had seen these laser stencils produced by Litko Aero. I spoke with James Hartman at one of the HMGS conventions about these stencils and asked whether it were possible to create a 1/2 square template. He obliged by creating a custom one for me and sending it out. It cost about $40 but was well worth it.
I wanted to use the stencil to paint 1/2 square pattern on the base tiles. I did a few experiments before I committed to a method. I tried brushing and sponging paint on the stencil but not surprisingly the method that worked best was to use my airbrush. I sprayed acrylic paint with acrylic airbrush thinner. If you try this at home, please remember that spray cans have a solvent thinner that can melt styrofoam plastic.
I made another jig for spraying. The finicky part of my experiments was making sure that the square grid was lined up right on the tile. I took a large flat piece of cardboard and cut out a hexagon the size of the tiles. The cut was intentionally on the small side so that the jig itself would hold the tiles while they were being sprayed. I then aligned the stencil one time and tape the stencil to the jig with masking tape.
I then sprayed each tile with Light Ghost Gray from Model Master. The stencil worked like a charm. I did some dumb things like wipe the stencil while I had a tile in the jig, but other than that the stencil was perfect. Thank you Jim and Litko!
I glued the top level cut pieces onto the base tile with white glue and the little sections came to life. Here’s one more pic:
One final note for the mathematically inclined: stenciling a orthogonal grid onto a hexagonal object does not produce a pattern where all sides interlock with the pattern going in the same direction (like in the pics.) I did some tests and found that the pattern twisting a bit at these joins did not detract from play and did contribute to the desired sense of misdirection and confusion that I was after.
On the to-make list now that I have a proof of concept:
- Larger open spaces
- More sharp turns
- Multi-level pieces with ramp/stair transitions to other “levels”
- Elevated drop offs
- Stream tiles
- Waterfall tiles
- Entrance transitions
- Blocked tiles (with kitty litter rubble)
- Ledge walk way
- Stone bridge
- Terraces
- Phosphoresecent mold on walls (hey it’s sci fi)
Whew! That’s enough for now. To be continued…
